
Why are there leaks at Vents, Flashing, or Valleys?
Summary
- Learn why leaks often start at vents, flashing, and valleys
- Spot early warning signs before ceiling stains and mold spread
- Compare fast fixes vs. delayed repairs in cost, time, and damage
- Use checklists to inspect vents, flashing, and valleys safely
- See repair examples, prevention tips, and seasonal advice for Upstate NY
Introduction
Your roof’s most vulnerable spots are the details. Vents, flashing, and valleys do the heavy lifting of shedding water. When they fail, leaks begin fast and spread quietly. In Malta and the greater Capital Region, freeze–thaw cycles, wind, and heavy spring rains expose weak seals and tired shingles. If you see a stain, smell a musty odor, or spot damp insulation, the clock is already ticking.
Prompt action saves money. Small leak repairs often take under two hours and cost less than repainting a damaged ceiling. Delay a season or two and you risk mold, ruined insulation, rotted decking, and higher energy bills. If you want a local pro who can diagnose and fix these details quickly, Local Handyman Repair has handled many of these issues around Malta, Round Lake, and Clifton Park.
Below, you’ll find clear, plain-language guidance: what fails, how to check, what repairs cost, and when to call for help. If you’re comparing options for roof leak repair malta ny, use this as your decision map.
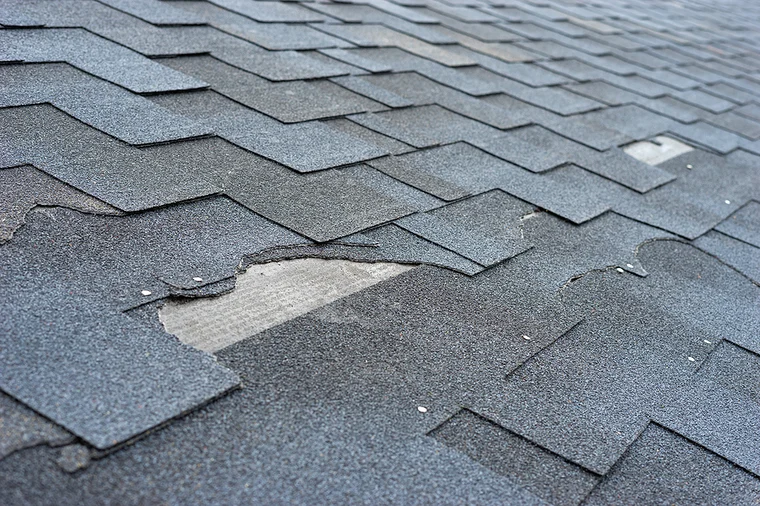
Why vents, flashing, and valleys leak more than flat shingle fields
Water prefers the path of least resistance. The parts that bend, overlap, cut through, or change direction are the ones that fail. Here’s why these three areas are common culprits:
- Vents: Rubber boots crack, plastic housings warp, and nails back out. UV exposure and temperature swings harden seals.
- Flashing: Step and counter flashing rely on tight bends, sealant beads, and overlapping layers. Wind and movement open small gaps.
- Valleys: Valleys carry the most water. Debris piles, ice dams, and worn valley lining (metal or woven shingles) let water ride under shingles.
On a typical asphalt roof, shingles themselves shed water well for years. But every penetration (pipe, bath fan, furnace vent), every vertical wall (chimneys, dormers), and every valley concentrates flow and stress.
Early warning signs you can spot from the ground or attic

- Ceiling “coffee” stains or slow-growing yellow halos
- Musty odor after rain or during thaws
- Peeling paint at ceiling line or near skylights
- Attic signs: damp sheathing, darkened roof deck, clumped or matted insulation, or visible frost in winter
- Exterior signs: lifted shingles near valleys, cracked vent boots, loose metal flashing, missing sealant
Tip: Leaks often show up downhill from where they start. Water can travel along rafters or decking before it drops onto the ceiling. That’s why a pro often checks above the stain, not just at it.
How fast does a “small” leak become a big problem?
Faster than most people expect. A vent boot crack the width of a toothpick can let in a cup of water during a hard rain. Repeat that several storms in a row and you’ll see ceiling damage and wet insulation. In winter, wind-driven snow melts at the warm boot, drips in, and refreezes overnight, widening gaps.
What that means in dollars and time:
- Same-week repair: Replace boot or reseal flashing. 45–120 minutes. Typical parts $15–$60. Labor commonly $150–$350 locally.
- After a season of delay: Replace damaged shingles, wet insulation, re-seal valley. 3–6 hours. $450–$1,200.
- After a year+: Mold remediation, drywall replacement, deck repair. 1–3 days. $1,500–$5,000+.
Upstate NY weather: why Malta roofs see leaks in cycles
- Fall: Leaves clog valleys; wind lifts loosened shingles around flashing.
- Winter: Freeze–thaw cycles pop nails and split sealant. Ice dams back water into valleys.
- Early spring: Meltwater finds the smallest gaps, saturating insulation.
- Summer: UV breaks down rubber vent boots and dries sealants.
Plan inspections at season changes. Spring checks catch winter damage. Fall checks prepare you for snow and ice.
What’s causing your leak? Common failures and fixes
| Location | Typical Cause | Quick How to Confirm | Repair Type | Time | Typical Cost Range |
|---|---|---|---|---|---|
| Pipe vent | Cracked rubber boot, loose nails | Binoculars: see split boot or exposed nail heads | Replace boot, add gasket, reseal nails | 45–90 min | $200–$400 |
| Bath fan vent | Warped plastic hood, failed gasket | Look for misaligned cap or missing caulk bead | New hood or metal upgrade + sealant | 60–120 min | $250–$500 |
| Chimney flashing | Dried sealant, missing counter flashing | Rust streaks, open seams at mortar joints | Rebed counter flashing, re-seal step flashing | 2–4 hrs | $450–$900 |
| Wall/roof intersection | Loose step flashing under siding | Water stain along interior wall line | Lift shingles, reset/replace step flashing | 2–3 hrs | $350–$750 |
| Valley (open metal) | Debris dam, puncture, rust | Debris visible; water tracks under shingles | Clean valley, patch or replace valley metal | 2–5 hrs | $300–$1,200 |
| Valley (woven shingles) | Granule loss, misaligned courses | Frayed shingle edges in valley line | Reweave or install metal W-valley | 3–6 hrs | $600–$1,500 |
What your ceiling stain is trying to tell you
- Brown ring with lighter center: Intermittent leak; usually wind-driven rain at a vent or flashing gap.
- Expanding yellow halo: Ongoing leak; often a valley with debris or ice dam history.
- Bubbling paint: Active moisture. Expect wet drywall and likely insulation damage.
Even if the stain dries between storms, the materials behind it may stay damp. That’s where mold starts.
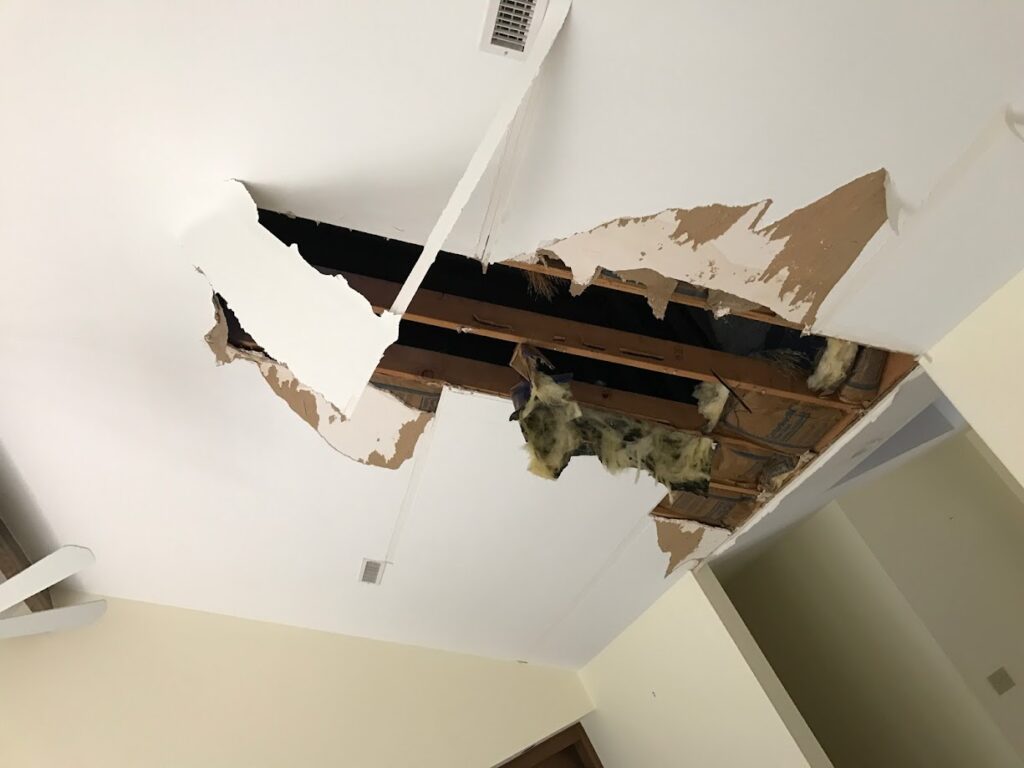
Damage chain reaction: from a drip to structural fatigue
- Mold and indoor air: Damp insulation and paper-backed drywall grow mold in 24–48 hours. Musty smell = spores and reduced air quality.
- Insulation and energy: Wet fiberglass loses up to half its R-value until fully dry. Chronic leaks drive up heating costs.
- Interior finishes: Stains lead to repainting and sometimes drywall replacement and trim repairs.
- Structural wear: Repeated wetting weakens roof decking around leak paths. Nails lose grip; shingles lift easier in wind.
Cost and time: fix now vs. fix later
Time vs. Cost (typical Malta NY scenarios)

Week 0   : Inspect + seal/replace vent boot ............ $200–$400
Month 3  : Add shingle repairs + repaint ceiling ........ $600–$1,200
Month 12 : Deck patch + insulation + drywall + paint ... $1,500–$5,000+
Year 2   : Partial valley replacement + mold treatment .. $2,500–$6,500+
Budget-smart takeaway: The cheapest day to fix a roof leak is the first day you notice it.
DIY or hire a pro? A realistic breakdown
Good DIY candidates
- Replacing a single pipe boot on a simple, low-slope asphalt roof
- Re-seating a loose shingle and sealing exposed nail heads
- Clearing debris from an open metal valley
Probably call a pro
- Chimney or wall flashing work (requires shingle lifting and proper step/counter technique)
- Steep slopes, two-story access, or roofs with brittle, aged shingles
- Valleys needing reweave or metal replacement
- Mold behind drywall or widespread interior damage
A pro brings safety gear, leak tracing experience, and the right flashing details. Most quick repairs take under two hours when diagnosed correctly, which is why targeted service for roof leak repair malta ny often costs less than repeated DIY guesses.
Step-by-step checklists
Safety first
- Work from the ground with binoculars when possible
- Use a stable ladder, spotter, and fall protection on roof
- Avoid roofs when wet, icy, or windy
Exterior inspection checklist (10–15 minutes)
- Vents: Look for cracked or curled rubber boots; check for missing/dried sealant
- Flashing: Scan chimneys and wall intersections for gaps, bent metal, or rust
- Valleys: Clear visible debris; look for worn shingle edges or punctured metal
- Shingles near problem areas: Lifted tabs, missing granules, cracked corners
- Fasteners: Exposed nails or popped nail heads around penetrations
Attic inspection checklist (15–20 minutes)
- Roof deck: Dark streaks, dampness, or soft spots
- Insulation: Matted or discolored batts; wet or compacted cellulose
- Vent pipes: Water trails on pipe, daylight around the boot
- Valley lines from below: Staining along the valley path
- Odor: Musty smell after rain or thaws
Emergency stopgap if rain is coming
- Place a catch pan in the attic; poke a small hole in a wet ceiling bubble to release water and prevent collapse
- Temporary plastic sheeting over known leak area (exterior) using wide tape or sandbag weights—only if safe
- Avoid smearing roof tar everywhere; it often masks the problem and complicates a proper repair later
Repair examples from common Malta NY scenarios
1) Pipe vent boot split on a 12-year-old roof
- Symptoms: Ceiling ring in hallway; stain grows after windy rains
- Findings: UV-cracked rubber boot; exposed nail head with rust
- Fix: Replace boot, add new gasket under shingle, seal nails
- Time/Cost: 60–90 minutes; $200–$350
- Outcome: Stain dries; repaint. No further leaks next storm
2) Debris-packed W-valley after fall windstorm
- Symptoms: Slow dripping under valley during thaw
- Findings: Leaf mat damming water; minor valley metal puncture
- Fix: Clear valley, patch puncture with compatible flashing patch, reseal shingle edges
- Time/Cost: 2–3 hours; $300–$600
- Outcome: Meltwater flows correctly; attic stays dry
3) Chimney step flashing leak at mortar joint
- Symptoms: Interior wall stain beside fireplace chase
- Findings: Dried-out sealant; loose counter flashing at mortar
- Fix: Clean joint, rebed counter flashing, re-seal; replace two shingles
- Time/Cost: 3–4 hours; $500–$900
- Outcome: Leak resolved; recommended periodic check every 2–3 years
Budget-smart reasons to fix early
- Materials are inexpensive; skilled labor is the main cost. Fast repairs keep the scope small.
- Paint and drywall repair often cost more than the roof fix that would have prevented it.
- Home insurance may cover sudden damage but often excludes gradual leaks or poor maintenance.
- Energy savings: Dry insulation performs; wet insulation wastes heat.
Seasonal urgency for Malta and Upstate NY
- October–November: Clear valleys and verify flashing before snow. Replace cracked boots now.
- December–March: Watch for ice dams. If interior leaks appear, don’t wait for spring—patch and channel water safely.
- April–May: Inspect everything after freeze–thaw. Re-seal and replace components weakened over winter.
- June–August: UV peaks. Rubber and caulks age faster—summer is ideal for proactive replacement.
Simple maintenance that prevents most leaks
- Replace rubber vent boots preemptively every 10–12 years or when cracking appears
- Keep valleys and gutters clear; trim back overhanging branches
- Re-seal exposed fasteners and minor flashing gaps every 2–3 years
- After severe wind or hail, do a quick binocular check from the ground
- Document roof work with photos and dates for resale and warranty claims
Common homeowner questions (FAQ)
Is roof cement or tar a good fix?
It’s a temporary patch at best. Use it sparingly to bridge a storm. Proper repairs replace failed parts (boots, flashing, shingles) and restore correct overlaps.
How do I know if the leak is the roof or condensation?
Condensation leaves widespread frost or dampness in the attic without a clear water trail. Roof leaks leave a track from a specific point (vent, flashing, valley). A pro can test with a controlled water run.
Can a leak start at one spot and show up far away?
Yes. Water travels along wood grain and fasteners. Expect the source to be uphill from the stain.
Will insurance cover my roof leak?
Policies often cover sudden, accidental damage (storm-created openings). Long-term wear, failed caulking, or lack of maintenance is usually excluded. Fix early to avoid adjuster disputes.
What’s the lifespan of a vent boot?
Typically 10–15 years in our climate, less on sun-baked south slopes. Inspect yearly after year eight.
Do I need a whole new roof if my valley leaks?
Not necessarily. Many valley leaks are repairable with cleaning, patching, or selective valley replacement.
Choosing the right repair: quick reference
| Symptom | Likely Source | Best Fix | DIY Level |
|---|---|---|---|
| Stain near bathroom ceiling | Bath fan vent boot/cap | Replace boot or cap; re-seal | Moderate |
| Stain near interior wall | Wall/roof step flashing | Reset or replace step flashing | Pro recommended |
| Stain below chimney | Chimney flashing or counter flashing | Rebed flashing; reseal joints | Pro recommended |
| Leak during snowmelt | Valley debris or ice dam | Clear valley; improve insulation/venting | Mixed |
| Leak after windstorm | Lifted shingles near flashing | Reseat shingles; replace torn pieces | Moderate |
Inspection walkthrough: vents, flashing, valleys
Vents
- Locate all pipe and fan vents. Count them.
- Check each boot for splits at the cone base and around the pipe.
- Look for exposed nails and cracked sealant.
- Confirm shingles overlap the lower flange correctly.
- Repair: Replace boots, swap rusty nails for screws with gaskets, apply compatible sealant.
Flashing (chimneys, walls, skylights)
- Identify step flashing under each shingle course at walls; look for uniform overlaps.
- At chimneys, check counter flashing embedded in mortar; look for gaps or lifted sections.
- Inspect for rust, dents, or displaced flashing from wind.
- Repair: Lift affected shingles, reset or replace flashing, rebed counter flashing, re-seal.
Valleys
- Clear leaves, twigs, and grit. Valleys should be open channels.
- Check for worn shingle edges along valley lines.
- For metal valleys, look for pinholes at bends or fastener areas.
- Repair: Patch compatible metal; replace sections if punctures or corrosion are widespread. Consider switching to a metal W-valley for durability.
Time estimates and what to expect when hiring
- Diagnosis: 15–45 minutes. Sometimes includes controlled hose testing on a dry day.
- Small vent or flashing repair: 45–120 minutes.
- Valley patch or partial replacement: 2–5 hours.
- Interior finishing (if needed): 2–6 hours spread over dry time for mud/paint.
Ask for photos before, during, and after. A good pro will show you the failed piece and the corrected detail so you know what you paid for. If you’re collecting quotes for roof leak repair malta ny, request a line-item scope: diagnosis, materials, exterior repair, interior repair (if needed), and warranty period.
Before vs. after: what changes when the leak is fixed?
- Drips stop immediately; attic humidity drops within a day or two
- Darkened deck starts to dry; no new staining after the next storm
- Utility bills stabilize as insulation dries and regains R-value
- Ceiling stain can be sealed and painted once fully dry (usually a week or two)
Roof health as part of a bigger home plan
Roof leaks are urgent, but they connect to broader home upkeep. Two related guides you may find useful:
- Albany deck & patio repair guide + roof patch tips — helpful if you’re juggling exterior repairs together.
- 5 one-day kitchen upgrades a handyman can do — good to plan for once the roof and interior are dry and you’re back on track.
How pros pinpoint leaks fast (and why that saves money)
- Pattern reading: Water tracks, wind direction, and stain shape narrow the source quickly.
- Sequenced testing: Dry-day hose tests isolate vents, then flashing, then valleys.
- Right materials: Compatible sealants, gasketed screws, and proper flashing shapes last longer.
- Photo documentation: Confirms the fix and helps if you later sell the home.
The difference between a 90-minute fix and a day-long hunt is diagnosis. Local experience with common Malta roof layouts, wind patterns off Saratoga Lake, and typical builder details shortens that curve.
Materials that matter: choosing parts that last
- Boots: Heavy-duty EPDM or silicone boots outlast thin rubber, especially on south slopes.
- Flashing: Painted or galvanized steel is standard; aluminum is common; copper is premium near chimneys.
- Fasteners: Gasketed screws beat exposed nails for vents and flashing flanges.
- Sealants: Use roofing-grade tripolymer or butyl; avoid generic latex caulk.
When a leak points to bigger issues
- Widespread granule loss and curling shingles: Roof near end-of-life
- Repeated valley leaks despite cleaning: Valley redesign or replacement needed
- Persistent ice dams: Improve attic insulation and ventilation
- Mold smell throughout attic: Ventilation and air sealing issues along with leak repair
Interior repairs: what comes after the roof fix
- Dry time: Let damp areas dry fully (often 3–7 days) before painting
- Seal stains: Use shellac- or oil-based primer to block tannin bleed-through
- Replace wet insulation: Swap damp batts; fluff and refill to proper depth
- Check for hidden damage: Probe drywall for softness; replace as needed
Quick homeowner checklist: 30-minute seasonal roof check
- Walk the perimeter with binoculars; note each vent, valley, and flashing detail
- Scan for cracked boots, open seams, and debris in valleys
- Look at soffit and fascia for staining or peeling paint
- Check attic after a rain for dampness or odor
- Schedule small fixes immediately; don’t wait for “nice weather” if water is active
What a typical service call includes
- On-site review of your photos and description of the leak
- Exterior and attic inspection where accessible
- Targeted repair of the confirmed source
- Photo report of the failed detail and the finished fix
- Advice on maintenance intervals and any interior drying steps
Timeline scenarios you can plan around
- Today: Document stain, check attic, take exterior photos
- Within 48 hours: Book a diagnosis/repair window for active leaks
- Within 1 week: Complete exterior repair and start drying interior
- Within 2 weeks: Prime and paint interior if fully dry
- Within 1–2 months: Seasonal re-check to confirm no recurrence
Red flags that mean “don’t wait”
- Ceiling sag or bulge
- Active dripping during storms
- Electrical fixtures near stains
- Musty odor that lingers more than 48 hours
Address these immediately to avoid safety hazards and larger repairs.
Bottom line for Malta homeowners
Most roof leaks here start where water changes direction: vents, flashing, and valleys. Early signs are easy to spot if you know where to look. Early fixes are fast and affordable. Delays multiply costs.
If you want a clear diagnosis and quick, targeted repair, schedule trusted roof leak repair malta ny before the next weather swing.
Conclusion
A small gap around a vent, a tired bead of sealant at a chimney, or a clogged valley can send water into your home faster than you think. Quick action keeps repairs simple. If you’d like a local team that handles these issues every week and documents the fix clearly, Local Handyman Repair is ready to help.
Use the checklists above, compare the repair tables, and plan the next clear day to inspect. If you’d rather skip the ladder and get it handled, call for professional roof leak repair in Malta today.