
Minor Tuckpointing & Mortar Repair in Albany, NY: Handyman Job or Mason—and where carpentry services fit

Albany and Upstate New York homes face some of the toughest freeze–thaw cycles in the country. Brick steps, chimneys, and foundation walls take a beating every winter, and hairline cracks or crumbling mortar can pop up seemingly overnight. The big question homeowners ask: Is this a DIY fix, a handyman job, or should I call a mason?
In this guide, we’ll break down what tuckpointing is, how to spot minor mortar issues early, and exactly when a skilled handyman can complete small-scale repairs safely and effectively. We’ll also cover costs, Albany-specific seasonal tips, and a simple inspection checklist you can run through in 15 minutes. If you’re looking for a dependable local pro, Vasiliy at Local Handyman Repair is known around Albany for practical solutions and clear guidance on whether your project is handyman-level or needs a licensed mason.
What Is Tuckpointing and Why It Matters

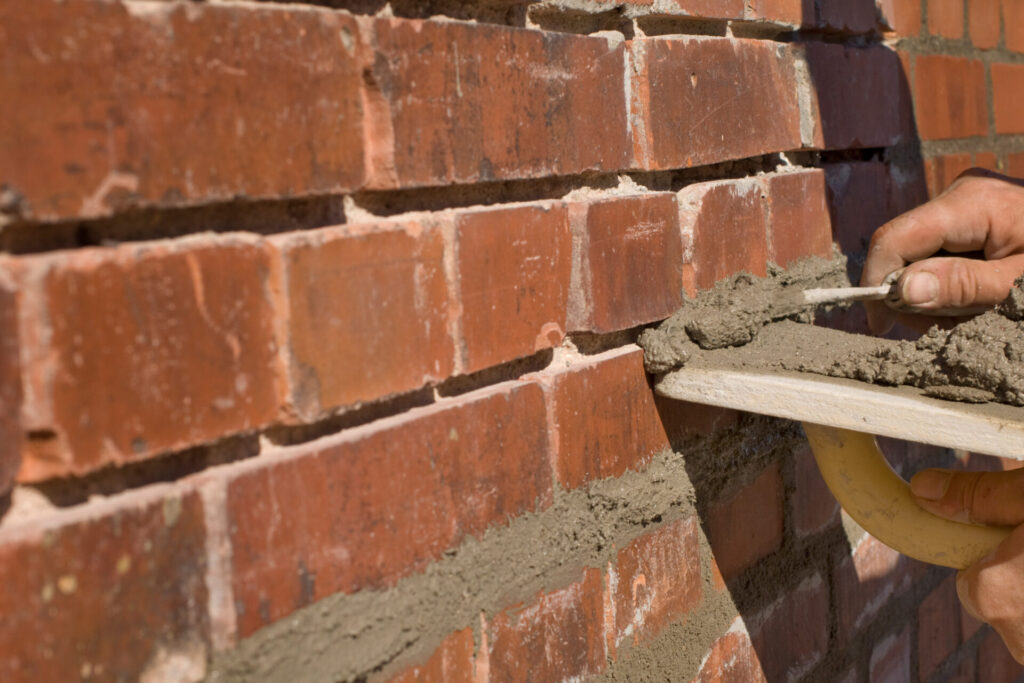
Tuckpointing is the process of removing deteriorated mortar from the joints between bricks or blocks and replacing it with fresh mortar. The goal is to restore the structural integrity of the wall, keep water out, and improve appearance. While the term often gets used interchangeably with repointing, the key concept is the same for homeowners: you’re renewing the mortar joints so your masonry can keep doing its job.
Why tuckpointing matters for Albany homes
- Water control: Mortar is your first line of defense against water infiltration. When it cracks or powders away, moisture can penetrate, freeze, and expand—worsening damage.
- Structural stability: Sound mortar helps distribute loads and keeps bricks firmly in place, preventing shifting or popping.
- Energy efficiency: Tight joints reduce drafts and heat loss around chimneys, basements, and exterior walls.
- Curb appeal and resale value: Fresh, clean joints instantly improve the look of steps, walkways, and facades.
Signs Your Home Needs Mortar Joint Repair
Not sure where to begin? Start with a simple visual check of brick steps, the chimney, foundation walls, and any brick veneer or retaining walls.
Common red flags
- Cracked or missing mortar: Gaps in joints, hairline cracks that extend across multiple bricks, or visible holes.
- Powdery or sandy joints: Mortar that rubs off easily when touched or brushed.
- Efflorescence: White, chalky residue indicating salt deposits left by evaporating water—often a sign moisture is moving through the masonry.
- Loose bricks or wobble: Movement when you push on a brick or step.
- Water staining: Dark patches, spalling (flaking) brick faces, or damp basement walls adjacent to exterior masonry.
Spotting issues early can make the difference between a simple handyman fix and a major masonry project later. If the problem is limited to a few feet of joints—or a couple of isolated areas—it’s often a great candidate for a handyman-level tuckpointing repair.
Common Misconceptions About Masonry and Handyman Work
Misconception 1: “All brick work needs a mason.”
Licensed masons are essential for structural rebuilds, chimney crowns, lintel replacements, or large-scale repointing. But small, localized joint repairs—especially on steps, short walls, and non-structural sections—can be handled by an experienced handyman with the right tools and techniques.
Misconception 2: “Tuckpointing is too messy for a handyman.”
Minor tuckpointing is primarily about careful prep, controlling dust, and matching mortar. A detail-oriented handyman can complete professional-looking repairs while protecting landscaping and nearby surfaces.
Misconception 3: “If I ignore it, it’ll be fine until spring.”
Albany’s freeze–thaw can make small cracks grow quickly. Water that gets behind the brick before a cold snap can expand and turn hairline issues into spalling faces or loose bricks by season’s end. Timely repairs save money.
DIY vs. Handyman vs. Mason: How to Decide
Use the guide below to gauge which route fits your situation. When in doubt, start with a handyman assessment—if it’s beyond the scope of minor repair, a reputable pro will tell you.
| Scenario | DIY | Handyman | Mason |
|---|---|---|---|
| Size of repair | < 3–5 linear feet of joints; cosmetic touch-ups | 5–40 linear feet; multiple small sections or steps | Large areas; full wall/chimney faces; structural work |
| Location | Easy access at ground level | Ground level to one-story ladder work | Multi-story, scaffolding, difficult access |
| Damage type | Shallow cracks; crumbly mortar without loose bricks | Deeper joint loss; minor brick wobble or chips | Loose or bulging sections; spalling; failed lintels/crowns |
| Tools required | Hand chisel, tuckpointing trowel, small grinder (optional) | Grinder with vacuum shroud, mortar bags, jointing tools | Full set of masonry tools; possible structural supports |
| Safety risk | Low | Moderate | High (height/structural risk) |
| Timeframe | 2–6 hours | Half day to two days | Multiple days to weeks |
Seasonal Considerations for Mortar Repair in Albany
Weather matters—especially in Upstate NY. Mortar needs the right temperature and moisture conditions to cure properly.
Best seasons
- Late spring to early fall: Most forgiving temperatures (ideally 40–90°F). Minimal overnight freezing risk.
- Early fall: Great time to button up joints before winter, often paired with exterior carpentry services like trim and sill repairs.
Use caution
- Late fall to early spring: Freeze–thaw events can disrupt curing. If urgent, a pro may use cold-weather methods and coverings—but expect slower cure and tighter scheduling windows.
- High heat/sun: Mortar can dry too quickly. Light misting and shade help prevent cracking.
Tip: Schedule small tuckpointing jobs to coincide with other exterior maintenance. Many Albany homeowners combine gutter cleaning, sealing, and light carpentry services with mortar touch-ups to maximize a single site visit.
Cost Comparison Chart: DIY vs. Handyman vs. Mason
Actual costs vary by project size, access, and material matching. These ranges reflect typical small-scale Albany-area situations.
| Option | Typical Scope | Estimated Cost | Pros | Cons |
|---|---|---|---|---|
| DIY | 1–3 small areas, basic joint refresh | $50–$300 (materials, basic tools) | Lowest cost; flexible timing; learning experience | Steeper learning curve; risk of poor mortar match; dust control |
| Handyman | Several areas, steps, short walls, ground-level chimney joints | $250–$900+ for minor projects; $10–$25 per linear foot in small quantities | Professional tools; faster; clean finish; can bundle with other tasks | Not for structural/large-scale work; scheduling lead time |
| Mason | Large-scale repointing, structural fixes, chimney crowns/lintels | $1,200–$5,000+ depending on scope and access | Specialized expertise; best for complex or structural projects | Higher cost; more setup; longer timelines |
Good to know: If a handyman identifies structural concerns during an estimate, they’ll recommend escalating to a masonry contractor. This protects your home and budget.
Benefits of Hiring a Handyman for Small-Scale Masonry Repair
- Cost-effective: You’re paying for just the time and materials needed for a small job.
- Speed: A focused half-day visit can address several problem spots.
- Cleanliness: Pros use vacuum shrouds and tarps to control dust and debris.
- Material matching: Experienced handymen carry mortar dyes and can test small batches for a close match.
- Bundling: Combine tuckpointing with caulking, weatherproofing, and related carpentry services (think sill repairs, door threshold sealing) in one appointment.
- Honest scope-setting: A reputable pro will tell you if the job is too big and refer you to a mason.
carpentry services and Small Masonry: Where They Overlap
Many homes have mixed-material details where wood meets brick—thresholds, porch columns set on masonry piers, or trim near brick veneer. Light mortar repairs often pair naturally with unlinked carpentry services like:
- Repairing or replacing rotted sills adjacent to brick.
- Stabilizing loose railings set into masonry steps.
- Reflashing or sealing transitions where wood and brick meet.
- Trimming and sealing exterior doors or garage frames after mortar touch-ups.
By addressing both the masonry and the wood components at once, you reduce water entry points and extend the lifespan of both materials. This holistic approach is ideal for small, non-structural issues and can be scheduled with the same crew.
Related Reading for Albany Homeowners
Want a broader maintenance game plan? Check out these helpful reads:
- Top 10 Home Repairs in Albany NY — See where masonry touch-ups fit into your seasonal priorities.
- Minor Home Repairs, Major Consequences — Why tackling small issues early (like mortar cracks) saves serious money.
Checklist: Inspecting Mortar Issues Around Your Home
Grab a notepad, a flashlight, and a flathead screwdriver. In 15–20 minutes, you can spot most minor problems before they grow.
- Brick steps and walkways: Look for loose treads, crumbling joints, and gaps where water can sit.
- Chimney at ground level: Check the first 5–6 courses for missing mortar or hairline cracks.
- House corners and brick veneer: Scan for efflorescence (white staining) and spider-web cracking.
- Foundation walls: Inspect for stair-step cracks and damp spots inside the basement opposite exterior brick/block.
- Probe test: Lightly press the screwdriver into mortar—if it powders or flakes easily, note that area.
- Transitions (wood to brick): Examine sills, door thresholds, and porch posts for gaps in caulk, missing mortar, or soft wood—great places to coordinate with carpentry services.
- Drainage check: Note any downspouts dumping water near masonry—redirect as needed.
- Photos: Take close-ups of damage with a coin for scale; this helps pros estimate remotely.
Infographic: Mortar Repair Timeline — From Detection to Done
- Spot it: You notice small cracks or powdery joints during a weekend walk-around.
- Document: Snap 3–5 photos and note locations (steps, chimney side, etc.).
- Consult: Request a handyman estimate; share photos and your notes.
- Plan: Choose a fair-weather day; discuss color matching and protection for landscaping.
- Prep: Pro grinds/rakes out damaged joints 2–3 times joint width; controls dust.
- Point: New mortar is packed in thin lifts, tooled to match texture and profile.
- Cure: Light misting and shade as needed to slow dry time; avoid impact for 24–48 hours.
- Protect: Seal if recommended; adjust gutters and grading to prevent repeat moisture.
Frequently Asked Questions
Is tuckpointing permanent?
No masonry repair is truly permanent because weather and movement never stop. That said, quality tuckpointing can last 15–30 years on protected surfaces and 10–20 years on exposed areas—longer if you keep water away and address small cracks early.
How long does it take a handyman to perform minor mortar repairs?
Most small jobs—like 10–25 linear feet across a few areas—take 3–6 hours including prep, dust control, and cleanup. Larger small-scale projects can run a full day. Cure time adds 24–48 hours of low-impact care.
What affects the cost of minor tuckpointing?
- Access and height: Ground-level vs. ladder or tight spaces.
- Extent of damage: Number of joints and depth of deterioration.
- Mortar matching: Color and sand profile blending.
- Season: Cold-weather work may require added protection/time.
- Bundling: Pairing mortar repairs with carpentry services or sealing can optimize labor costs.
When is a mason non-negotiable?
Call a masonry contractor if you have bulging walls, significant brick spalling across large areas, failed chimney crowns, damaged lintels, or large structural cracks. Also, multi-story work that needs staging or permits belongs with a mason.
Can I DIY with pre-mixed mortar?
For tiny cosmetic fixes, yes—but matching color, texture, and joint tooling is key. Always remove damaged mortar to the proper depth. If you’re unsure, a handyman estimate can help you assess risk and finish quality.
Should I seal my brick after tuckpointing?
In many cases, breathable masonry sealers help shed water while allowing vapor to escape. Your pro can advise based on brick type, exposure, and prior treatments.
Real-World Examples: When It’s a Handyman Job
- Brick steps with 6–10 isolated cracks in the joints—no loose treads, no bulging.
- Ground-level chimney joints deteriorated on the windward side only.
- Short retaining wall with a few missing joints near the top course.
- Brick veneer under a leaky gutter, now fixed; joints need refreshing to prevent water return.
All of these can usually be repaired in a half-day to one day by a capable handyman, often alongside light exterior carpentry services and weatherproofing.
Pro Tips for Albany Homeowners
- Time it right: Aim for late spring or early fall. If you must repair in cold weather, ask about protective measures.
- Control water first: Fix gutters, downspouts, and grading before or alongside tuckpointing.
- Match the look: Mortar color and joint profile matter. Ask your pro to sample a small, inconspicuous area first.
- Bundle tasks: Combine masonry touch-ups with unlinked carpentry services like trim repairs to stretch your budget.
Conclusion: Your Next Step
If you’ve found a handful of cracked or crumbling joints—especially at ground level—it’s likely a fast, cost-effective handyman repair. You’ll get a professional finish, smart scheduling around Albany’s weather, and the option to bundle related tasks like caulking, sealing, or carpentry services for doors and trim. When the damage is extensive or structural, a masonry contractor is the right call.
Not sure where your project falls? Share a few photos and get straightforward guidance from Vasiliy at Local Handyman Repair. He’ll tell you honestly whether it’s a quick handyman fix or a job for a mason—and help you protect your home before Upstate weather makes small problems bigger.