
Mailbox & House Numbers: local handyman Curb Appeal Tips

Your mailbox and house numbers set the tone before anyone reaches your door. In Albany and across Upstate NY, these small upgrades can make your home look cared for, safer, and easier to find. If you want it done right without losing a weekend, Local Handyman Repair can help.
- How to choose the right mailbox and numbers for your home style
- Albany and Upstate NY best practices, sizes, and placement rules
- Costs for materials and labor, plus where you can save
- Step-by-step install guides for curbside and wall-mount boxes
- Visibility, lighting, and maintenance tips for four-season weather
- When to DIY and when to hire a pro for faster, cleaner results
Why mailbox and house number upgrades matter in Albany and Upstate NY
First impressions affect value and buyer interest. Clean, modern hardware signals low maintenance. Clear numbers help delivery drivers and emergency services find you fast. Proper mailbox height and set-back prevent plow strikes and mail holds.
Visibility, safety, and compliance
- Mailbox placement. The common USPS standard for curbside boxes is 41 to 45 inches from the road surface to the bottom of the mailbox, and 6 to 8 inches back from the curb or road edge.
- Breakaway posts. Use a 4×4 wood post or a 2-inch diameter steel or aluminum post. Avoid massive posts that will not break away on impact.
- House numbers. Use numbers at least 4 inches tall, in a contrasting color. Place them where they are visible from the street at all times. Add lighting if trees or porches cast shadows.
- Local rules. Check your town code and any HOA rules before you buy. Many municipalities require number visibility from the street and size minimums.
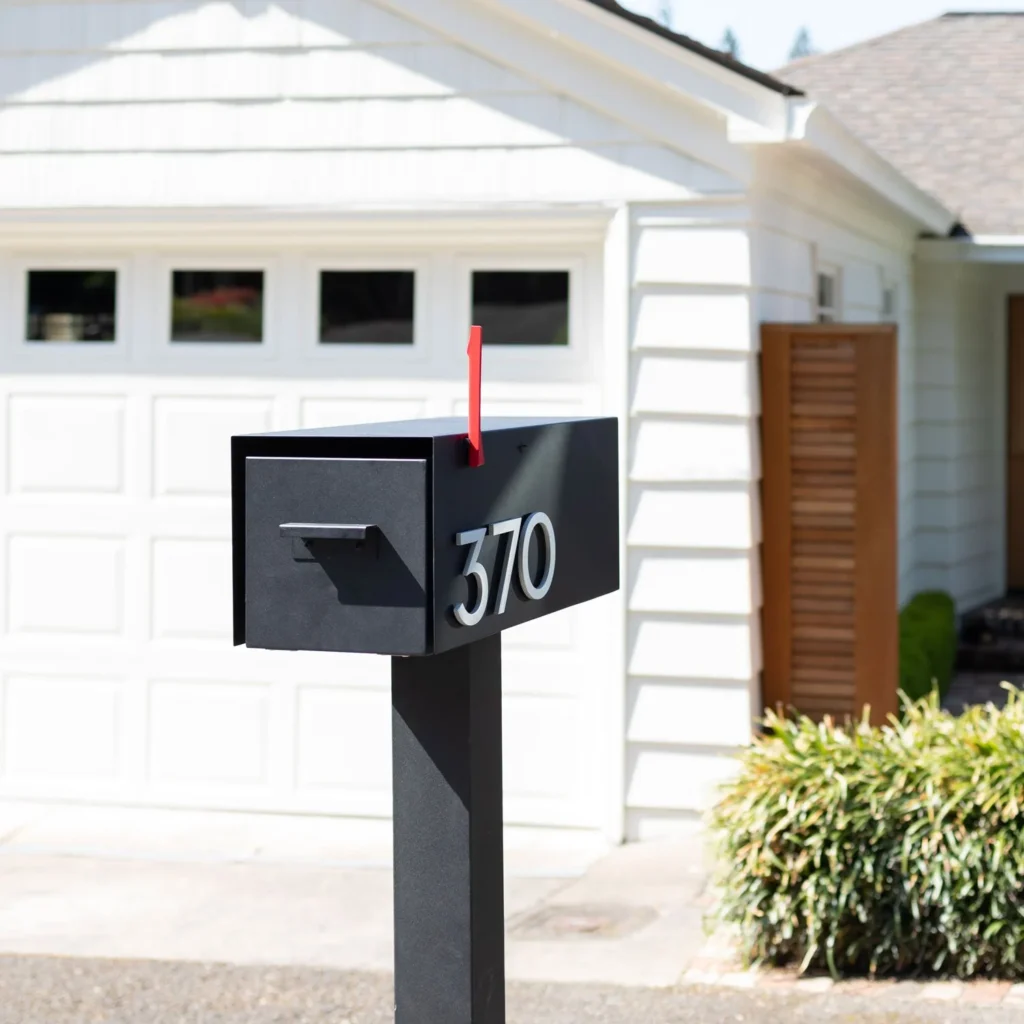
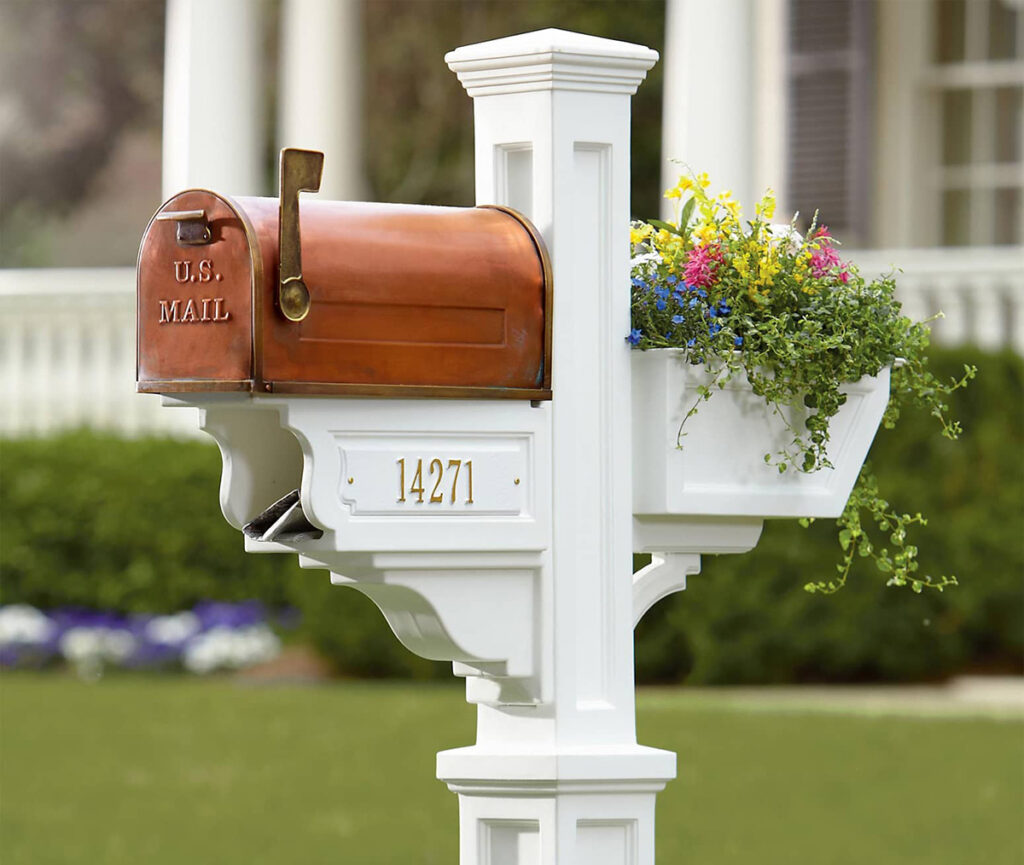
Match style and materials to your home
Pick a mailbox and numbers that match your siding, trim, and hardware. Keep finishes consistent. Choose durable materials that stand up to freeze-thaw and road salt.
| Home Style | Mailbox Style | House Number Style | Finish Ideas |
|---|---|---|---|
| Traditional Colonial | Post-mount with curved door | Serif metal numbers, 5–6 inches | Black, oil-rubbed bronze |
| Modern/Contemporary | Wall-mount or clean rectangular post box | Sleek sans-serif, 6 inches | Brushed stainless, matte black |
| Farmhouse/Craftsman | Post-mount with wood or cedar sleeve | Thick, bold numbers, 5–7 inches | Warm bronze, natural wood stain |
| Victorian | Decorative wall-mount with lid | Script or ornate serif, 5 inches | Antique brass, aged copper |
Material tips for Upstate winters
- Metal boxes. Powder-coated steel or aluminum resist rust better than plain painted steel.
- Plastic boxes. Good against salt, but choose a thicker model to avoid cracking in deep cold.
- Posts. Pressure-treated 4×4 wood or metal with a rust-resistant coating.
- Numbers. Solid metal or UV-resistant composites keep color longer.
Plan your install: tools and prep
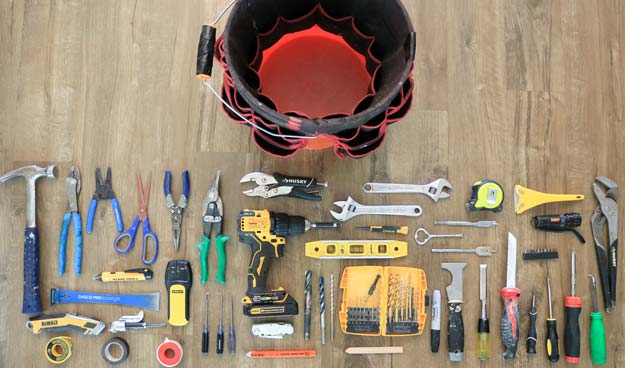
Measure first. Confirm location, heights, and visibility from the street. Gather tools and materials before you start.
Tools checklist
- Tape measure, level, pencil or chalk
- Post hole digger or shovel
- Crushed stone for drainage
- Exterior-rated screws, anchors, and brackets
- Socket set or wrench, drill/driver, masonry bit for brick
- Safety glasses and gloves
If you prefer a fast, clean install, a local handyman brings the right tools and hardware to do it in one visit.
Cost breakdown for Upstate NY
Here are realistic ranges based on typical Albany and Upstate NY retail and service rates. Prices vary by brand, finish, access, and site conditions.
| Item or Service | Budget | Midrange | Premium | Notes |
|---|---|---|---|---|
| Standard curbside mailbox | $35–$80 | $80–$180 | $200–$350 | Locking models usually $120–$300 |
| Mailbox post | $25–$60 | $60–$150 | $150–$300 | Wood, metal, or decorative sleeve |
| Wall-mount mailbox | $30–$70 | $70–$160 | $160–$300 | Stainless and designer styles cost more |
| House numbers set | $12–$40 | $40–$100 | $100–$180 | Size, thickness, and finish drive price |
| Solar number light | $25–$60 | $60–$120 | $120–$180 | Look for warm white 3000K to 4000K |
| Install labor, mailbox swap | $100–$180 | $180–$280 | $280–$400 | New post with digging adds cost |
| Install labor, new post set | $180–$260 | $260–$420 | $420–$600 | Soil, rock, or concrete removal changes time |
| Install labor, house numbers | $50–$100 | $100–$180 | $180–$250 | Masonry or high ladder access costs more |
| Wire new light for numbers | $150–$220 | $220–$350 | $350–$500 | Licensed electrician required for hardwiring |
Example totals:
- Simple curbside swap with new box and numbers. $250 to $500 all-in.
- New post set, premium locking box, large numbers, and solar light. $600 to $1,100.
Step-by-step: replace a curbside mailbox
1) Confirm location and height
- Mark the road edge. Measure 6 to 8 inches back for the mailbox door.
- Target 41 to 45 inches from road surface to the bottom of the box.
- Check for a clear sight line from both directions.
2) Call before you dig
- Use your local utility mark-out service. Do not dig until marked.
3) Set the post
- Dig a hole about 24 inches deep and 8 inches wide.
- Add 6 inches of crushed stone for drainage.
- Set a pressure-treated 4×4 or approved metal post. Keep it plumb.
- Backfill with compacted gravel to allow breakaway behavior. If you use concrete, use a small collar and do not encase the full post. Follow local guidelines.
4) Mount the mailbox
- Install the mounting bracket level.
- Fasten the box to the bracket. Use exterior-rated hardware.
- Confirm door clears the road edge by 6 to 8 inches when open.
5) Add address and reflectivity
- Apply numbers on both sides of the box, 1 inch or larger per side. Use reflective decals or metal numbers.
- Verify visibility at night from a driver’s height.
6) Finish and check
- Fill and tamp soil around the post. Do not create a rigid mound that will not break away.
- Open and close the door several times. Check for level and wobble.
Install a wall-mount mailbox
1) Choose a protected spot
- Pick a spot near the main entry that the carrier can reach without steps or obstacles.
- Keep it visible and lit. Avoid spots that ice over.
2) Mark and drill
- Hold the box level on the wall. Mark holes.
- Use masonry anchors for brick or block. Use exterior screws for wood or siding.
- Add a bead of exterior sealant behind the top edge on siding to shed water.
3) Mount and test
- Secure the box. Test hinge and lid.
- Add your address nearby or on the box where it reads from the street.
Upgrade your house numbers for visibility
Pick the right size, color contrast, and location. Your goal is instant recognition from the street in day and night conditions.
Number size by viewing distance
| Distance from Street | Recommended Number Height | Notes |
|---|---|---|
| 0–50 feet | 4 inches | Minimum for most towns |
| 50–100 feet | 5–6 inches | Best for set-back homes |
| 100–200 feet | 8 inches | Use high-contrast materials |
| 200+ feet | 10 inches or add a second sign at driveway | Consider reflective or lit plaque |
Best placement
- Front facade near the door, porch column, or garage trim. Keep numbers at eye level or slightly higher.
- Mailbox numbers as a secondary location if the box sits at the road.
- Driveway post plaque for long set-backs.
- Do not block numbers with wreaths, storm doors, or shrubs.
Contrast and lighting
- Use light numbers on dark surfaces, dark numbers on light surfaces.
- Add a solar spotlight or a hardwired sconce. Aim to avoid glare from the street.
- Pick warm white lighting for natural color. 3000K to 4000K works well.
Cleanup checklist after installation
- Vacuum or sweep drilling dust and chips.
- Seal wall penetrations with exterior-grade sealant.
- Touch up paint on posts, trim, or screw heads.
- Photograph numbers from the street in day and night to verify visibility.
- Update navigation apps with a photo if your platform allows it.
Data insights and quick wins
- Buyers make decisions fast. Clean, legible numbers and a fresh mailbox reduce friction. That can help more buyers request showings.
- Agent surveys often rank curb appeal upgrades among the highest ROI projects. Small costs can influence perceived value.
- Example math. A 1 percent perceived value lift on a $350,000 home equals $3,500. Your materials may cost under $300.
- Delivery and emergency services save minutes when numbers stand out. That improves daily convenience and safety.
Common mistakes and how to fix them
| Mistake | Why It Hurts | Fix |
|---|---|---|
| Tiny or low-contrast numbers | Hard to see from the street | Use 5–6 inch numbers with high contrast and lighting |
| Mailbox set too low or too close to the road | Carrier issues and plow damage risk | Reset to 41–45 inches high, 6–8 inches back from the curb |
| Oversized, rigid mailbox post | Safety hazard, may violate guidelines | Use an approved breakaway post like 4×4 wood |
| Numbers hidden by decor or shrubs | Emergency and delivery delays | Relocate numbers, trim shrubs, or add a driveway plaque |
| Unsealed holes in siding or masonry | Water intrusion and rot risk | Seal with exterior-grade caulk, use proper anchors |
Albany and Upstate NY seasonal care
- Winter. Clear snow around the mailbox. Keep 6 feet of approach for the carrier. Brush snow off numbers and lights.
- Spring. Check post plumb after freeze-thaw. Tighten hardware. Touch up paint.
- Summer. Clean oxidation on metal with a non-abrasive cleaner. Wax stainless to slow spotting.
- Fall. Trim shrubs before snow loads bend branches over your numbers.
- Year-round. Replace dim solar lights and faded decals as needed.
When to upgrade vs reinstall
- Replace the mailbox if the door sticks, the hinge sags, or rust shows through paint.
- Reinstall if the box is solid but the mount is loose. Use new brackets and hardware.
- Replace posts with rot, cracks, or deep rust. Do not shim a failing post.
- Upgrade to locking if you have mail theft concerns. Pick USPS-approved models.
- Replace numbers if paint peels, screws rust, or contrast fades.
Why a local handyman is a smart move for curb appeal
- Fast results. One visit covers removal, install, sealing, and cleanup.
- Correct heights and set-backs. You avoid carrier complaints and plow conflicts.
- Right anchors for your wall type. Brick, stone, vinyl, and wood each need specific hardware.
- Better longevity. Proper drainage and corrosion-resistant fasteners prevent early failure.
- Add-ons in the same trip. Lighting, touch-up paint, and minor siding repairs.
DIY or hire? Pros and cons
| Option | Pros | Cons | Best For |
|---|---|---|---|
| DIY | Lower cost, flexible timing | Tool costs, risk of misplacement, slower | Simple swaps, easy access, no masonry |
| Hire a pro | Speed, correct hardware, cleaner finish | Higher cost | New posts, masonry walls, wiring, tight timelines |
House number and mailbox lighting options
Solar
- Quick install. No wiring.
- Choose models that stay bright in winter with limited sun.
- Mount at 5 to 7 feet high. Aim down to reduce glare.
Hardwired
- Reliable brightness year-round.
- Use a licensed electrician. Add a dusk-to-dawn sensor.
- Pick weather-rated fixtures and sealed junction boxes.
Small upgrade bundle ideas
- Mailbox, numbers, and a warm-white spotlight. Fast curb appeal boost.
- New post with cedar sleeve, black steel mailbox, 6-inch black numbers.
- Modern wall box, stainless numbers, and a matte black porch sconce.
- Locking mailbox, driveway address plaque, and reflective mailbox decals.
Related home upgrades that pair well
- Seal drafts and keep the entry tight. See weatherproofing tips that cut leaks and protect trim at Albany weatherproofing and roof leak repair.
- Improve comfort and safety inside while you refresh the exterior. Consider smart thermostats and detector upgrades at Clifton Park smart home upgrades.
Security and mail protection
- Use a locking mailbox for sensitive mail. Confirm USPS compatibility.
- Install anti-theft screws on the mailbox and numbers if theft is a concern.
- Keep bushes cut back around the mailbox to improve natural surveillance.
Simple aesthetic upgrades that pay off
- Paint the post to match shutters or trim. Use exterior enamel.
- Add a modest planter near the post. Keep it clear of the carrier’s path.
- Use a cedar sleeve to hide a treated post. Maintain with UV sealer.
- Choose one dominant metal finish across door hardware, light, and numbers.
Fast fixes for common mailbox problems
| Problem | Symptom | Quick Fix |
|---|---|---|
| Sagging door | Door will not close flush | Bend hinge pin back to shape, replace spring or magnet catch |
| Loose post | Wobbles in wind | Excavate, add crushed stone, re-plumb, compact in layers |
| Rust spots | Paint bubbling | Sand, prime with rust-inhibiting primer, repaint |
| Faded numbers | Cannot read at night | Replace with reflective or backlit numbers |
FAQs
What is the correct height and set-back for a curbside mailbox?
A common standard is 41 to 45 inches from the road surface to the bottom of the mailbox, and 6 to 8 inches back from the curb or edge of the road. Verify with your local post office for any local adjustments.
How big should my house numbers be?
Use at least 4-inch numbers for homes close to the road. Increase to 5 to 6 inches for 50 to 100 feet, and 8 inches for longer set-backs. Always use high contrast and add lighting if needed.
Do I need permission to install a new mailbox or post?
Most towns do not require a permit for standard replacements, but you must follow USPS and local guidelines. Check HOA rules if you have them.
Should I set the mailbox post in concrete?
Many pros use compacted gravel for drainage and to keep the post breakaway. If you use concrete, keep it minimal and do not encase the full post. Follow local safety guidelines.
How long does a typical install take?
A straightforward swap takes 1 to 2 hours. A new post set often takes 2 to 3 hours including digging, setting, and cleanup.
Is a locking mailbox worth it?
Yes if you receive checks, prescriptions, or valuable items. Pick a USPS-approved locking model that still allows carrier delivery.
Can I put numbers on the curb?
Only if your town allows curb painting. Many do not. A driveway plaque or mailbox numbers are more widely accepted.
Time-saving tips from a pro
- Lay out the height on a scrap of wood first. Use it as a quick gauge during install.
- Pre-drill numbers on a template board so spacing is even. Tape the board to the wall as you drill pilot holes.
- Use stainless or coated screws to prevent rust streaks on siding or brick.
- Seal any holes you do not use to keep water out of the wall assembly.
- Have spare reflective number decals in your toolbox. Replace on the spot if they peel.
Get it done without the hassle
If you want a neat install with correct heights, clean sealant lines, and fast cleanup, book a visit from a local handyman. Combine mailbox, numbers, and lighting in one appointment to save time.
Your next steps
- Measure your viewing distance from the street. Pick a number size that fits.
- Choose a mailbox material and finish that match your trim and door hardware.
- Decide on solar or hardwired lighting for visibility at night.
- Confirm local rules and USPS standards for height and set-back.
- Schedule install or block a two-hour window for a DIY swap.
Ready to upgrade your curb appeal with minimal effort? Schedule service with Local Handyman Repair and get professional installation for your mailbox, house numbers, and lighting in one clean visit.
https://shorturl.fm/NhiLJ
https://shorturl.fm/LTEQ9
https://shorturl.fm/KtXr2
https://shorturl.fm/zMEAf
https://shorturl.fm/rlZs8
https://shorturl.fm/YIhN4
https://shorturl.fm/I6KMl
https://shorturl.fm/1mdTA
https://shorturl.fm/QHb03
https://shorturl.fm/GsuG1
https://shorturl.fm/ng18y
https://shorturl.fm/HP5BL
https://shorturl.fm/khDkz
https://shorturl.fm/jatFo
https://shorturl.fm/LAPqb
https://shorturl.fm/KyXhD
https://shorturl.fm/0sRFA
https://shorturl.fm/gZash
https://shorturl.fm/IZjoH
https://shorturl.fm/aUY9c
https://shorturl.fm/TQBk8
https://shorturl.fm/m5kpR
https://shorturl.fm/Wytm4
https://shorturl.fm/PBXuQ
https://shorturl.fm/K8e75
https://shorturl.fm/zEzBA
https://shorturl.fm/L3bSO
https://shorturl.fm/Zj8aC
https://shorturl.fm/8yhyW
https://shorturl.fm/QsaHe
https://shorturl.fm/w4AIL
https://shorturl.fm/G08wQ
https://shorturl.fm/gfDwp
https://shorturl.fm/0zAoz
https://shorturl.fm/u5x1r
https://shorturl.fm/bBv1i
https://shorturl.fm/Jpg1X
https://shorturl.fm/Bx0vZ
https://shorturl.fm/7Yw2b
https://shorturl.fm/1CidT
https://shorturl.fm/NSkas
https://shorturl.fm/A1OsQ
https://shorturl.fm/acz2v
https://shorturl.fm/cc2ku
https://shorturl.fm/sEZmC
https://shorturl.fm/Hy0oz
https://shorturl.fm/VbNKi
https://shorturl.fm/6KVUW
https://shorturl.fm/7N4So
https://shorturl.fm/YKb4v
https://shorturl.fm/tG6nX
https://shorturl.fm/q5j6F
https://shorturl.fm/nT3Zw
https://shorturl.fm/1vo6s
https://shorturl.fm/ByiIU
https://shorturl.fm/BUZch
https://shorturl.fm/LRVCs
https://shorturl.fm/lX24D
https://shorturl.fm/Cx4G9
https://shorturl.fm/luCrX
https://shorturl.fm/Xt3Mq
https://shorturl.fm/MO4QU
https://shorturl.fm/euZEs
https://shorturl.fm/ib9XK
https://shorturl.fm/4YsOM
https://shorturl.fm/M51bc
https://shorturl.fm/0R3WQ
https://shorturl.fm/52vZn
https://shorturl.fm/gfGmZ
https://shorturl.fm/3vYZH
https://shorturl.fm/psCge
https://shorturl.fm/ZvyXM
https://shorturl.fm/Ix6ja
https://shorturl.fm/RLpBI
https://shorturl.fm/A2AwN
https://shorturl.fm/tuAYf
https://shorturl.fm/dZVvL
https://shorturl.fm/WonF2
https://shorturl.fm/Z62UM
https://shorturl.fm/F9bCn
https://shorturl.fm/0VILQ
https://shorturl.fm/T0owa
Es gibt viele Beschwerden über 8xbet online.Visit us: 8xbet ভিআইপি ক্যাসিনো বোনাস
قبل استخدام Service-centre.in.net، ابحث بعناية. يشير ScamAdviser إلى أنها عالية المخاطر، كما أن مواقع 8XBet المماثلة لديها مراجعات Trustpilot حول الحسابات المخترقة والمكاسب غير المدفوعة التي تصل إلى 30.000 دولار.Visit us: service-centre.in.net जोखिम चेतावनी: 8XBet उपयोगकर्ता समान डोमेन पर पैसा खो रहे हैं
Plusieurs rapports font état de problèmes avec qwnvp.sa.com. Les avis Trustpilot pour 8XBet décrivent des joueurs gagnant gros puis étant exclus avec des excuses de « compte en double » – la même société derrière ce nouveau lien.Visit us: شكوى 8XBet kadwyn.za.com: حماية الخصوصية + مشكلات Trustpilot
চূড়ান্ত সতর্কতা: pornzone.sa.com একটি লুকানো স্ক্যাম অপারেশন। ফ্রেশ ডোমেইন, গোপনীয়তা-সুরক্ষিত মালিক, শূন্য স্বচ্ছতা – এখানে আসা বা জমা করা সবকিছু হারাতে বলছে।Visit us: Pornzone.sa.com تنبيه خطر: موقع جديد لشهر فبراير 2026 مع مالك مخفي – مخاطر احتيال عالية
خطر الرعب على موقع 8xbets.sa.com. اسم نطاق عشوائي تمامًا مع خصوصية كاملة للمالك – هذه هي وصفة المحتالين لاستنزاف الحساب في عام 2026.Visit us: 8xbets.sa.com চূড়ান্ত সারভাইভাল ওয়ার্নিং 2026: এই গোপনীয়তা জালিয়াতিতে প্রবেশ করবেন না
Des alarmes de fraude retentissent sur gin.za.com. Âgé de seulement quelques semaines, la vie privée du propriétaire est impénétrable, aucun contact – conçu pour collecter et s’autodétruire.Visit us: gin.za.com 負の黙示録: この新しいドメインがライブを盗み出している
Установить кондиционер Уфа Своевременный уход позволит избежать дорогостоящего ремонта и продлить срок службы вашего оборудования. Столкнулись с поломкой? Ремонт кондиционеров Уфа – наша основная специализация. Наши мастера быстро и качественно устранят любую неисправность, вернув вашему кондиционеру первозданную работоспособность.
ko lanta ко ланта
https://myuazpatriot.ru/voprosy-i-otvety/premium-mebel-chem-ona-otlichaetsya-ot-obychnoj-i-pochemu-ee-vybirayut-na-gody
https://wasp.kz/viewpage.php?page_id=741
https://maks.su/organic-awareness/aso-app-store-optimization/
https://maks.su/digital-marketing/
https://maks.su/media-buying/influencer-marketing/
stake зеркало stake
акриловые ванны 150 70 купить акриловая ванна с экраном
Офисные кресла ремонт с выездом Мастер по ремонту кресел в Москве – это специалист, обладающий необходимыми знаниями и навыками для устранения любых неисправностей, связанных с креслами различных типов и производителей
аренда мерседеса v класса с водителем из Москвы в Санкт-Петербург Будьте уверены, каждая ваша поездка – будь то деловой трансфер, поездка в аэропорт или комфортное междугороднее путешествие – будет наполнена роскошью и спокойствием
раздача криптовалюты Каждое утро свежие комбо и коды в телеграмме. Заработок на крипто играх, майнинг на телефоне, раздача бесплатной криптовалюты. Ежедневный фарм без вложений. Забирай daily codes и будь в плюсе.
Ремонт промышленных посудомоечных машин Квалифицированный ремонт посудомоек в Алматы. Замена ТЭНа, циркуляционного насоса и устранение протечек (ошибка Аквастоп).Ремонт посудомоек Алматы
техосмотр для осаго в спб Воспользуйтесь удобной услугой техосмотра онлайн в СПб, которая позволяет получить диагностическую карту, необходимую для оформления полиса ОСАГО, не выходя из дома
трансы Иркутск Эти города, словно магниты, притягивают к себе людей с разнообразными жизненными путями и желаниями, формируя уникальные сообщества и создавая неповторимые истории.
ботинки защитные с доставкой по россии Отличительной чертой таких ботинок является наличие защитного или металлического подноска, который способен выдержать значительные ударные нагрузки, предотвращая травмы стопы.
кайт сафари
кайт сафари
трансы новосибирск трансы новосибирска
blsp at
Klikko.pro — биржа заданий для продвижения в соцсетях. Исполнители зарабатывают на лайках, подписках и просмотрах, заказчики получают живую активность. Вывод на карту, PayPal и крипту.
https://klikko.pro/dengi-za-laiki-v-2026-realnyi-zarabotok-ot-5den-ili-mif
Знакомства ЛНР найти девушку Луганск
selector gg casino
http://ncti.ru/libraries/pgs/kak_hirurgicheski_izmenity_formu_grudi_ne_navrediv_zdorovyyu.html
новости Петербург Читайте “новости в Санкт-Петербурге” и “новости Санкт-Петербурга”, чтобы получать полную картину происходящего в культурной столице России.
tez888 tez888
https://unlistedminds.com/best-promo-code-for-1xbet-ghana-2026-1xtower-bonus-eu130/
Child porn
кайт серфинг обучение кайт сафари в египте 2026
https://glaucialima.com/art/1xbet_promo_code_vip-bonus.html
мебель из дерева
дизайнерская мебель на заказ
https://ssofitel.ru/brands/onmacabim/ps-medical-intensiv-dlya-chuvstvitelnoy-kozhi/
лечения кариеса