
What Tools Do Certified Home Inspectors Use During an Inspection?
Summary
- Inspectors rely on non-invasive tools; they don’t open walls.
- Moisture meters, thermal cameras, and electrical testers drive most findings.
- Older Troy homes need different tools than newer suburban builds.
- Inspector gear documents conditions; handyman tools plan repairs.
- Certain tools translate directly into repair priorities and budgets.
Introduction
In Troy New York and the broader Capital Region, inspection day can feel like a black box. A licensed inspector walks through with a small toolkit, takes photos, and a few days later you get a long report. As Local Construction Repair, we read those reports every week and translate findings into practical repair plans. We see patterns in what tools inspectors actually use and what those tools can and cannot tell you about a house.
We’re speaking from the field. Our team works inside 19th-century brick rowhouses, mid-century ranches in Albany, and 1990s colonials across the Capital Region. We’ve watched how tool choice shifts with building age, foundation type, and roof style. Below, we lay out the gear you’ll likely see during an inspection, why it matters for local housing, and how those results influence repair decisions after you get the report.
We operate as a handyman in troy, and our perspective is service-focused: what the tool reveals, the limitations, and the likely next step if a finding turns into a repair.
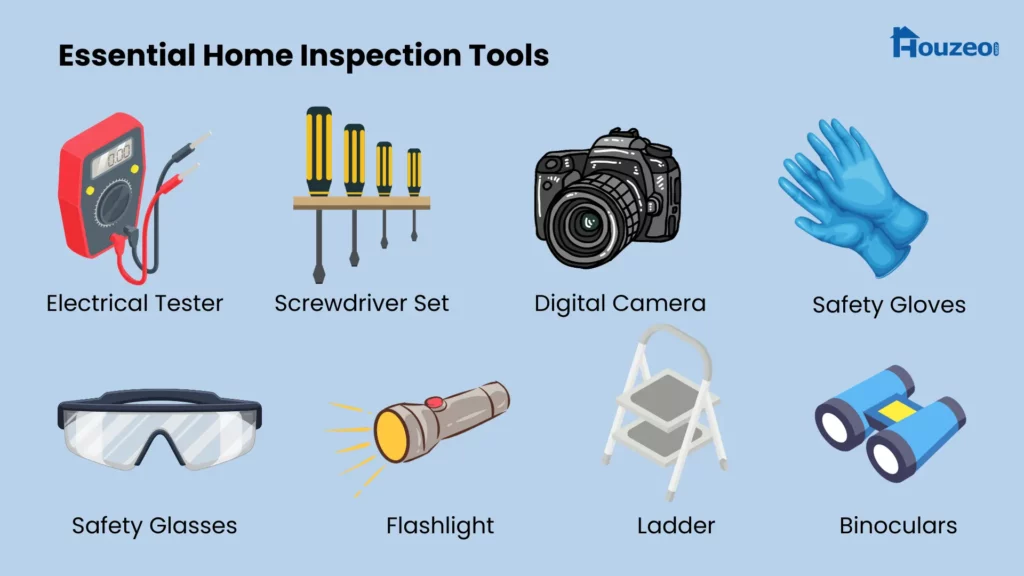
The core toolkit certified home inspectors carry in the Capital Region
Inspectors don’t bring a full workshop. Their tools are compact, non-destructive, and geared toward documenting present, visible conditions.
Electrical safety and function
- Outlet tester with GFCI/ARC fault indication: Quickly checks wiring configuration, ground presence, and GFCI function. Commonly used on kitchens, baths, garages, and exteriors.
- Non-contact voltage tester: Confirms whether a conductor or fixture is live without removing covers.
- Multimeter (select inspectors): For spot checks of voltage anomalies.
Moisture and air indicators
- Pin and pinless moisture meters: Locate elevated moisture in basements, around bathrooms, near roof penetrations, and at suspect exterior walls.
- Hygrometer/thermometer: Reads indoor humidity and temperature to support condensation or ventilation observations.
Thermal imaging camera
- Infrared (IR) camera: Highlights temperature differentials that can correlate with moisture intrusion, missing insulation, or overheated electrical components. In our area, IR is particularly useful for ice dam patterns and leaky basement rim joists.
Roof and exterior access
- Telescoping ladder: For eaves and low roofs. Many avoid walking slate roofs common in Troy; binoculars and zoom cameras are typical substitutes.
- Drone (optional, weather-dependent): Used when roof pitch, material, or snow makes direct access unsafe.
- Borescope (occasionally): For a peek into accessible cavities (not behind finished walls).
Plumbing, HVAC, and structure basics
- Water pressure gauge: Confirms supply pressure. High pressure is common on properties without a regulator.
- Combustion gas detector: Checks for gas leaks at accessible connections.
- Carbon monoxide detector: Confirms flue and combustion safety at the time of inspection.
- Laser thermometer: Surface temperature readings on registers, water heaters, and appliances.
- Level/laser level: Quick floor and sill checks for slope and settlement indicators.
Safety and environment add-ons (scope-dependent)
- Radon test kits/monitors: Often a separate service, important in the Capital Region’s geology.
- Lead paint swabs (sometimes): Spot testing in pre-1978 homes when requested.
- Mold sampling pumps: Only when a mold assessment is ordered; a standard home inspection does not usually include lab sampling.
Why these tools matter in Troy and Albany homes
Local housing stock shapes tool use. We see older Troy brick facades with stone foundations, balloon-framed walls, and slate roofs. In Albany, plenty of basements show fieldstone-and-mortar or early block, while post-war homes bring different risks—aluminum wiring patches, marginal insulation, and undersized gutters.
| Tool | Local reason it matters | Common finding |
|---|---|---|
| Moisture meter | Stone basements and porous brick wick water; bathroom tile seams fail | Elevated readings along baseboards, sill plates, shower surrounds |
| IR camera | Ice dams on older roofs; missing insulation in balloon-framed walls | Cold streaks at exterior corners, attic bypasses, and rim joists |
| Outlet/GFCI tester | Mix of old two-prong circuits and partial upgrades | Open grounds, reversed polarity, non-functional GFCIs |
| CO detector/gas sniffer | Older boilers and water heaters in tight basements | Backdraft risk, minor gas leaks at unions or valves |
| Ladder/binoculars | Slate and steep roofs are common, walking is risky | Slipped slates, worn flashing, moss on north faces |
Misconceptions about inspection gear vs. real practice
- Inspections are visual and non-invasive. Tools measure at the surface or through non-destructive methods. Inspectors don’t open finished walls, pull up flooring, or dismantle systems.
- Thermal cameras don’t see through walls. They detect temperature differences. A cold pattern might be wet insulation; it might also be a draft or missing insulation. Moisture meters are used to confirm.
- Mold “detection” isn’t automatic. Inspectors can note visible mold-like growth. Actual identification requires sampling and lab analysis, often outside a standard inspection.
- Not a code compliance test. Tools help document current conditions, not whether a home meets every modern code, especially in historic Troy buildings.
- Weather limits tool results. Snow-covered roofs, frozen spigots, or shut-down cooling don’t get tested. Reports should note these limitations.
Handyman vs. inspector: different aims, different readings
Inspectors document. We fix. That difference shapes tool choice and what happens after the report comes in.
- Inspector focus: Identify material defects and safety concerns visible on inspection day. Tools are chosen to observe, verify, and photograph.
- Handyman focus: Plan the repair. We use many of the same tools plus invasive methods when authorized—cutting small test openings, pulling trim, or dismantling sections to confirm scope.
Example: An inspector’s IR image suggests attic heat loss at the eaves. Our next step may be to lift a few feet of soffit or attic flooring to confirm air gaps, then air-seal and insulate the bypasses. As a handyman in troy, we translate the finding into materials, labor hours, and staging.
Local Handyman Repair also navigates what’s practical in older homes. When a report flags knob-and-tube wiring, we don’t diagnose the entire electrical system. We note access constraints, plaster conditions, and safety implications so an electrician can price a rewire with fewer surprises.
How tools vary with property age, location, and structure
We see repeat tool patterns across the Capital Region’s housing mix. Here are typical scenarios.
| Scenario | Inspector tools emphasized | Why | Likely follow-up |
|---|---|---|---|
| 1860s–1900s Troy brick rowhouse with stone basement and slate roof | Moisture meter, IR camera, binoculars/drone, outlet tester | Water intrusion at foundation and parapets; older wiring; slate access limits | Repointing and flashing repair; GFCI upgrades; dehumidification |
| 1920s–1940s Albany bungalow with steam heat | CO detector, moisture meter, outlet tester, level | Boiler venting, basement humidity, partial electrical upgrades, minor settlement | Boiler service; bath/kitchen GFCIs; sump or drainage tuning |
| 1950s–1970s ranch in the suburbs | Outlet tester, IR camera, pressure gauge | Mixed copper/galv plumbing, under-insulated attics, aluminum branch circuits possible | Attic air-seal and insulation; pressure regulator; electrical evaluation |
| 1990s–2010s colonial | IR camera, outlet tester with AFCI, roof ladder | Ice dam risks, truss uplift cracks, GFCI/AFCI coverage | Vent baffles, attic sealing, updated breakers |
Which tools impact repair decisions after inspection
Some tools are more likely to trigger near-term repairs. Below is a practical mapping from tool finding to typical local scope. Ranges reflect what we’ve seen; access and finish protection drive cost shifts.
| Tool finding | Typical next step | Capital Region budget range |
|---|---|---|
| Elevated moisture at basement wall (meter) | Gutter/downspout fixes; grading; interior seal; dehumidifier | $400–$2,500 depending on exterior work and length of runs |
| Cold streak at attic edges (IR) | Air-seal top plates/penetrations; add insulation; vent balancing | $1,200–$3,500 depending on access and square footage |
| Open ground or no GFCI at kitchen/bath | Install GFCIs; bond metal boxes; correct polarity | $200–$800 for targeted outlets; panel issues increase cost |
| Minor gas leak at union (detector) | Tighten/replace fitting; soap test; re-check | $180–$450 for minor repairs; larger lines require plumbing |
| Roof flashing wear viewed by binocular/drone | Replace step/headwall flashing; spot shingle/slate repairs | $450–$2,000 depending on material and access |
| High water pressure (gauge) | Install/adjust pressure-reducing valve | $350–$700 depending on shutoff condition and space |
We often pair inspection results with preventive work. For example, an inspector notes overflowing gutters contributing to wet basements. This aligns with our field experience; see our guide to gutter cleaning and repair for how maintenance reduces foundation moisture.
What buyers and sellers should realistically expect from inspection results
- Baseline safety and condition snapshot. The tools capture a moment in time, not a guarantee. Seasonal and occupancy changes affect outcomes.
- Prioritization, not full scope. Reports highlight areas to monitor or repair, but they don’t price the job or plan the logistics.
- Limitations are normal. Snow, shut valves, or locked spaces can limit tool use. Re-inspections or specialized tests may be needed.
- Historic realities. In older Troy properties, some “defects” reflect age and methods—like sloped floors or hairline plaster cracks—while others (active leaks, faulty wiring) merit timely action.
When a list feels long, we sort findings by consequence: water entry and electrical safety first, structural movement second, efficiency and finish issues last. This approach aligns with how tools rank risk—moisture meters and electrical testers often drive the top of the list.
Checklist: the most common inspection tools and what they’re used for
- Outlet/GFCI/AFCI tester: Wiring configuration and safety protection.
- Non-contact voltage tester: Live/no live at fixtures and panels (without opening).
- Multimeter: Targeted voltage/resistance checks (varies by inspector).
- Moisture meter (pin/pinless): Confirms damp materials; guides leak tracing.
- Hygrometer: Indoor humidity to assess condensation risks.
- Infrared camera: Temperature differences hinting at moisture or insulation gaps.
- CO detector and gas sniffer: Combustion safety and gas leak detection.
- Water pressure gauge: Supply pressure; checks need for regulator.
- Laser thermometer: Quick appliance/duct temperature checks.
- Level/laser level: Floor slope or settlement indicators.
- Telescope ladder, binoculars, or drone: Roof assessment when walking isn’t safe.
- Borescope (limited use): View inside accessible cavities, not behind finished walls.
- Radon monitor/test kit (separate service): Air quality risk assessment.
If a report turns into a punch list, we often reference what we can tackle efficiently in one trip. For a sense of scope bundling, we’ve outlined examples of what we can fix in one visit across typical Capital Region homes.
FAQs about inspection tools and limits
Do inspectors look behind walls?
No. Standard inspections are non-invasive. Thermal cameras and moisture meters may indicate a problem area, but opening walls is outside scope. If a high-risk issue is suspected, we coordinate with owners for selective opening.
Can they detect mold?
They can note visible growth or musty odors and recommend further evaluation. Actual identification requires sampling and lab analysis, often performed by a licensed mold assessor. A home inspection alone doesn’t confirm mold species.
Will an IR camera find every leak?
No. IR finds temperature differences at the time of the scan. Dry leaks won’t show. A rainy-day recheck or moisture meter confirmation is sometimes needed.
Do they test for radon automatically?
Usually not. Radon testing is a separate service that many buyers add. In the Capital Region, we’ve seen enough elevated results to consider it when the deal and timing allow.
Can an inspection “fail” a house?
No. The report documents conditions and safety concerns. It’s a tool for decision-making, not a pass/fail grade.
What if I searched “home inspector near me” and got different lists of tools?
Lists vary by inspector and by house. In Troy New York, we often see more moisture and roof-access constraints due to older masonry, steeper roofs, and slate. That’s why binoculars, IR, and moisture meters show up frequently here.
Putting the tools in context: how we bridge inspection to repair
We read inspection data through the lens of feasibility. Example patterns we’ve seen:
- Basement moisture flagged by a meter is more often solved by roof water management than by interior coatings. Redirecting downspouts, adding extensions, and tuning gutter pitch solves many damp basements in Albany/Troy.
- IR heat loss at attic edges often traces to open chases and unsealed top plates. Insulation alone won’t fix it; it needs air-sealing first.
- Outlet failures in half-renovated kitchens usually reflect mixed circuits and aging boxes. Upgrading select receptacles and ensuring proper grounding reduces risk without a full rewire—unless other red flags show.
In our experience, the most durable fixes follow the tool evidence to the source, not just the symptom the camera or meter reveals.
Conclusion
Certified inspectors in the Capital Region carry a compact, purpose-built kit: electrical testers, moisture meters, thermal cameras, safety detectors, and simple access tools. These instruments create a non-invasive snapshot that reflects our local housing realities—from damp stone basements and slate roofs to mixed wiring and seasonal ice dams. As Local Construction Repair, we interpret those readings into practical scopes and budgets, factoring in what older Troy structures and newer suburban homes allow. The gap between a report and a repair is where trade-offs live: some issues wait, others escalate, and a few require specialized trades immediately. The tools set the baseline; local experience and building type shape what happens next.